¶ CIFS Share
A CIFS Share can be created to provide access to a NAS Volume via CIFS/SMB.
¶ To Create a CIFS Share on an Existing Volume:
- Navigate to the NAS Dashboard.
- Click Volumes on the left menu (or click the Volumes quick link).
- Click the Volume for which you wish to create a CIFS share.
- Click View on the left menu.
- Click CIFS Shares.
- Click New to create a new share.
- Enter a Name for the CIFS share (required).
- A Share Path can be entered to define a specific path within the Volume; otherwise, this field can be left blank to share the entire Volume.
- Optionally, A Description can be entered for the Share to record additional information about the Share.
- Optionally, A Comment can be entered for the Share. This text is seen next to a share when a client queries the server or uses net View to list what shares are available.
- Optionally, a Valid Users list can be specified. This defines the users that are allowed to connect to the Share.
- Optionally, a Valid Groups list can be specified. Users of the specified groups are allowed connection to the Share.
- The Allowed Hosts field allows you to define one or more hosts that are permitted to access the Share. Hostname, IP address, domain name, netgroup, and subnet are all valid entries.
- The Denied Hosts field allows you to define one or more hosts that are NOT permitted access to the Share. Hostname, IP address, domain name, netgroup, and subnet are all valid entries.
- The Read-Only option can be selected to deny any write operations via this Share.
- The Browseable option can be selected to make the Share visible in lists of available shares. This option is disabled by default. Users must directly connect to the share path when a share is not browseable, rather than finding/accessing via browsing.
- Admin Users / Admin Groups allow you to grant administrative privileges to the Share. This means that all file operations will be done as the super-user (root). Use this option carefully, as those in this list will be able to do anything on the Share, irrespective of individual file permissions.
- Force User / Force Group options can be specified to define a user or group used for all file operations performed via this Share (regardless of the user account used to connect to the Share).
- Advanced Configuration Options (advanced samba share options) can be specified to handle special-case scenarios. These are for advanced, non-typical scenarios; VergeIO Support can assist in defining advanced options.
- Click Submit to save the settings and create the new CIFS Share.
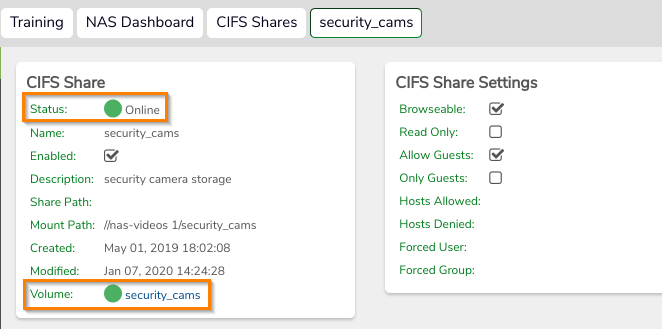
- The Share Status will show as “Online” when successfully created and ready for use.

¶ Set The Folder Owner:
After the Share is created, it is recommended to use a client computer to browse to the new Share and adjust the folder owner to an AD account.
- Navigate to the Share. For example: \nas-videos\security_cams
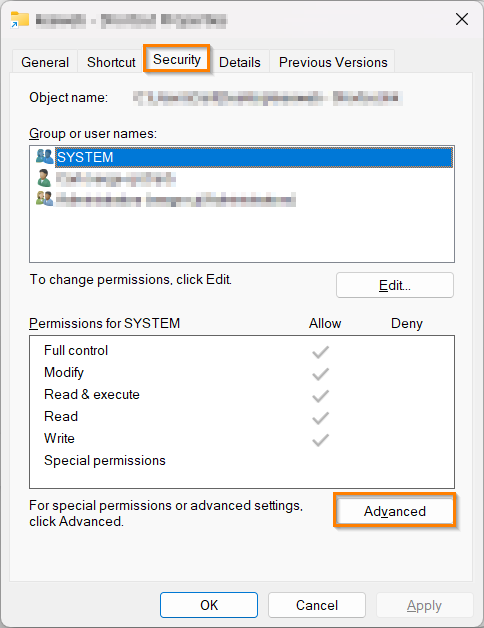
- Right-click on the Share and click on Properties to bring up the properties of the Share
- Click on the Security tab, and click on Advanced to access Advanced Security Settings for the Share.

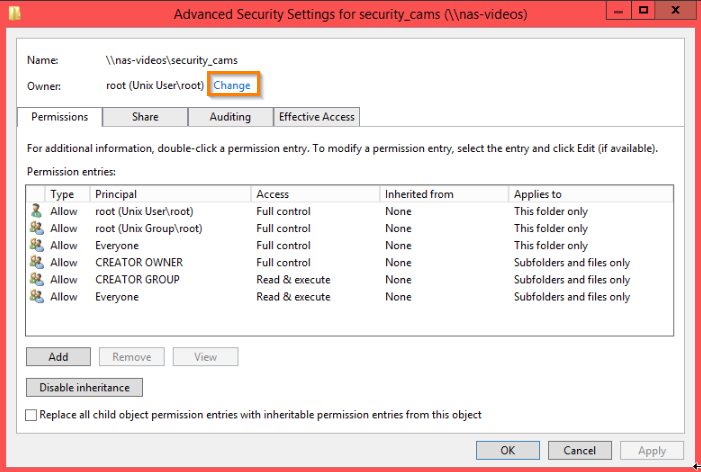
- From the Advanced Security Settings screen, click on the Change link next to the Owner field.

5.Select an appropriate Active Directory account to own the folder.
¶ If a Share fails to Come Online:
- Verify the underlying Volume is online. The Volume is listed on the Share dashboard (A green circle indicates online).
- Check Share dashboard logs (bottom of Share dashboard page) for potential error messages.
¶ If you cannot connect to the CIFS share in Windows:
Most likely you need to Enable insecure guest logins for SMB shares in Windows.
- Open the Local Group Policy Editor (gpedit.msc) on your Windows device.
- In the console tree, select Computer Configuration > Administrative Templates > Network > Lanman Workstation.
- For the setting, right-click Enable insecure guest logons and select Edit.
- Select Enabled > OK.
Need more Help? Email [email protected] or call us at (855) 855-8300