¶ How to configure NAT 1:1 - Translate WAN / Public IP to Private IP
WARNING: This is for setting up a 1:1 NAT to an internal resource in the existing Tenant. If you are setting up a Public IP for a tenant, choose Owner Type of Tenant and set the owner to that Tenant.
¶ Assign the Public IP:
- From the External Network’s Dashboard, click IP Addresses on the left menu.
- Click New.
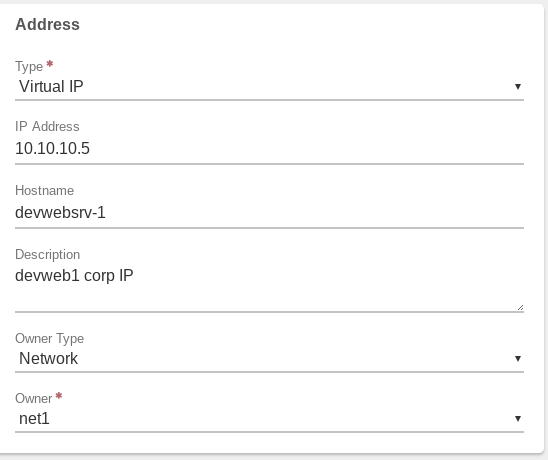
- In the Type field, select Virtual IP.
- In the IP Address field, enter the public IP Address.
- Enter the Hostname.
- Optionally, Description can be entered to record additional administrative information.
- In the Owner Type dropdown list, select Network.
- In the Owner dropdown list, select the name of the Internal network.
- Click Submit.

After the Virtual IP is created on the External Network and owner set to the private network, routing rules are auto-created by the system to handle routing the public / external IP address from the External to the Internal Network.
¶ Create a translate Rule to NAT public/external IP to the private IP:
- From the Internal Network’s Dashboard, Click Rules on the left menu.
- Click New on the left menu.
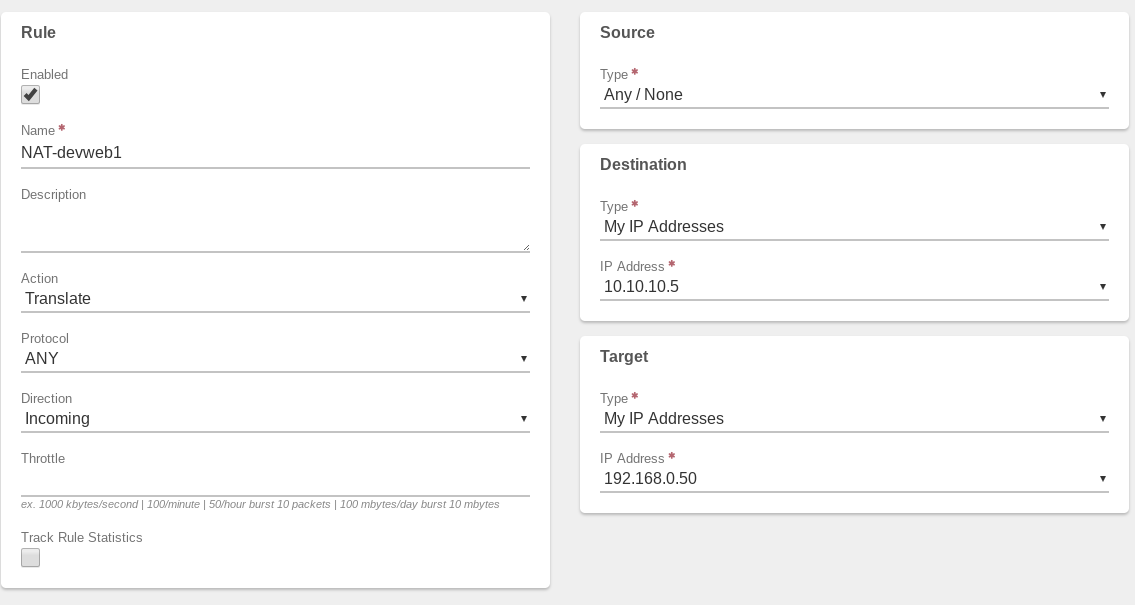
- Enter a Name that will be helpful to future administration.
- Optionally, a Description can be entered to record additional administration information.
- In the Action dropdown, select Translate.
- In the Protocol dropdown, select ANY.
Note: For our example, we are creating a 1:1 translation - anything coming in on the designated public IP will be translated to the private IP, so we are selecting ANY(all) protocols. You could also select to only translate a specific port to be translated here. A Port Translation example is provided in Module 2.4.5 - NAT - PAT Example
- In the Direction dropdown, select Incoming.
Source:
- In the Type dropdown, select Any / None.
Destination:
- In the Type dropdown, select My IP Addresses.
- In the IP Address dropdown, select the public IP address.
Target:
- In the Type dropdown, select My IP Addresses.
- In the IP Address dropdown, select the private IP address.
- Click Submit.

- Click Apply Rules on the left menu to put the new Rule into effect.
Need more Help? Email [email protected] or call us at (855) 855-8300