¶ How to import Physical/Virtual Machines into VergeIO
Clone ISO Transfer Utility
ISO Version 4.8.2
The VergeIO Clone Utility (VergeIO-clone.iso) can be used to import external servers (physical or virtual) into VergeIO virtual machines. Zero block detection is used in transferring source drives, providing efficiency as only used blocks require transfer. The VergeIO Clone Utility is recommended for PtoV imports (importing physical computers) and non-VMware VtoV (importing existing virtual machines). The VergeIO VMware connector is recommended for importing VMware virtual machines.
¶ Prerequisites
-
VergeIO System (destination):
- Network URL that can be accessible from Source VMs to be imported.
- VergeIO username/password with permissions to create VMs
- Adequate available vSAN storage for cloned VM drives (Note: VergeIO vSAN global deduplication handles zero blocks; thus, only actual used drive space is required.)
- Although not necessary for the clone-import process, adequate resources (RAM/CPU) will need to be available on the destination system to run imported VMs.
-
VM/Physical Machine to Clone (Source):
- Network connection (attached to a network that can reach the destination system)
- Attached USB/CD-ROM device (containing VergeIO -clone.iso)
- Minimum 1GB RAM (to boot from/run the iso)
-
Determining Appropriate Sync Method
The appropriate sync method to use will depend on the nature of the network connection between the Source VM and the destination system. -
Https Upload
Transferring using this method has minimal network configuration requirements. This transfer method is automatically selected by default. -
vSAN-direct Sync
The vSAN-direct sync method can be used for optimum throughput over a LAN connection. It is not intended for WAN connections. -
vSAN-direct syncs are only allowed to the host system (not directly to a tenant)
This method provides for faster transfer speeds but involves additional network requirements. The vSAN-direct method can be selected under Advanced settings from the confirmation screen (last dialog). -
Additional Network Requirements for vSAN-direct Sync method:
- Source side static IP
- Destination VergeIO system static IP
- NAT and SNAT rules on the UI(external) and core networks of the VergeIO system
¶ Obtaining the VergeIO-clone.iso File
-
From the Main Dashboard, click Backup/DR on the left menu.
-
Click the Add Clone ISO button in the Clone ISO Utility section.

-
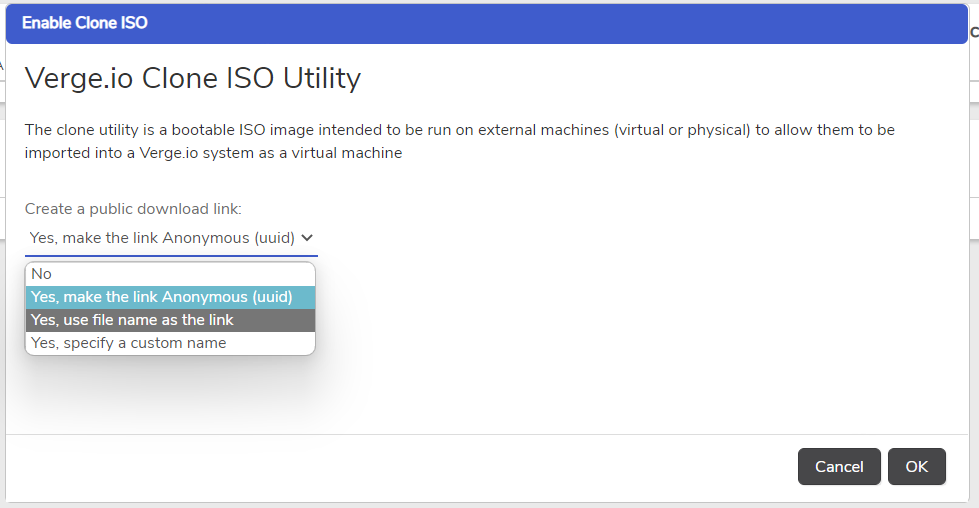
The Clone ISO dialog appears, giving options for the creation of a public download link for the ISO file:
- No No public download link is created. The Clone ISO will only be downloadable from the VergeIO UI.
- Yes, make the link Anonymous (UUID) (default selection) - creates a public download link with GUID (128bit long number)
(ex: https://Verge.example.com/273b5d6a--b205-1e1b-6ae6-01cfa7cj1233)
- Yes, use the filename as the link - creates a public download link using the original file name (ex: https://verge.example.com/VergeIO -clone.iso)
- Yes, specify a custom name - creates a public download link with file name entered (ex: https://verge.example.com/myfilename.iso)
-
Click OK after selecting the desired option. The build process may take a few minutes to complete.

-
Once the build is complete, the Clone ISO section will show a Ready status. Additionally, the version, public link (if applicable), and the build date/time will display.
Note: the copy icon next to the public link field can be used to copy the URL to the clipboard.
- Download the ISO; it can now be downloaded from:
- Within the VergeIO UI
-OR- - The public link (if created)
The bootable Clone ISO can be used on CD or USB. See bootable-usb for instructions on making a bootable USB. Substitute the Clone ISO.
¶ Using the VergeIO Clone Utility
-
Power down the source computer and boot from the Clone ISO ( VergeIO-clone.iso)
-
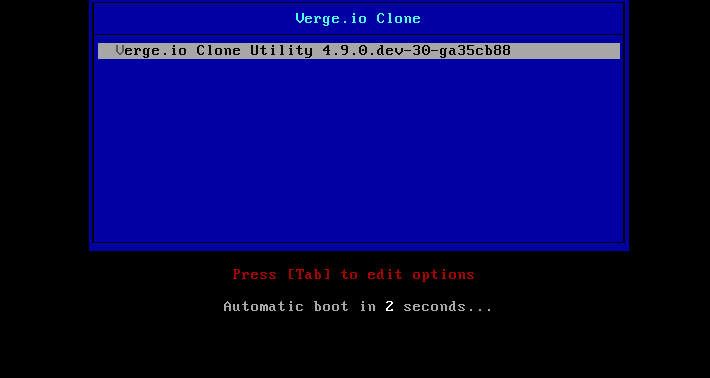
Hit Enter or allow the clone utility to boot automatically.
-
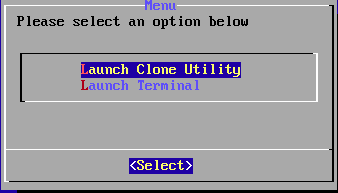
Select Launch Clone Utility.
-
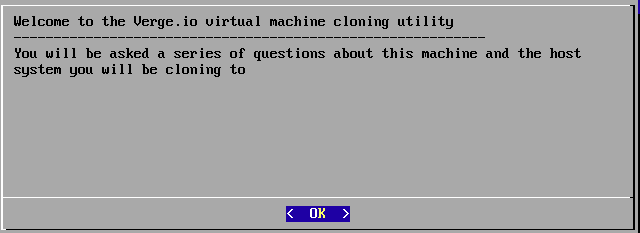
Hit Enter to confirm the introduction message.
- Select the NIC to be used to connect to the destination VergeIO system. Only one NIC is selected for connecting to the destination; however, all NICS from the source system are brought over in the VM import.

-
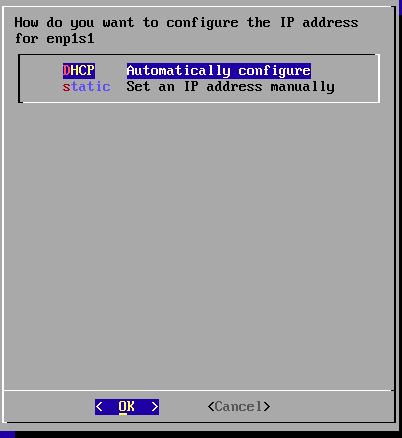
Select the appropriate choice (DHCP or Static) for the connecting network.
¶ Static IP configuration
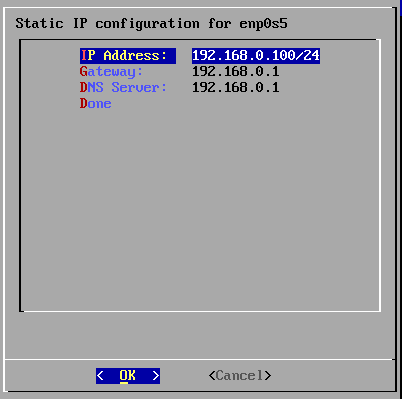
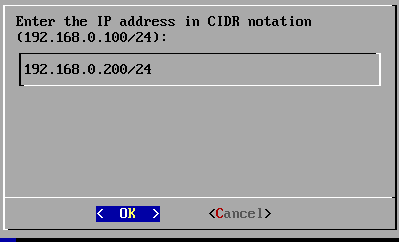
If static IP configuration is selected, use up/down ↑/↓ arrows to select different fields. The selected field is highlighted in blue. Hit Enter while a field is selected to modify that field. Once all the static fields are configured as needed, use arrow keys to highlight the Done option and Enter to proceed.
-
Enter the VergeIO system's URL (hostname or IP address).
-
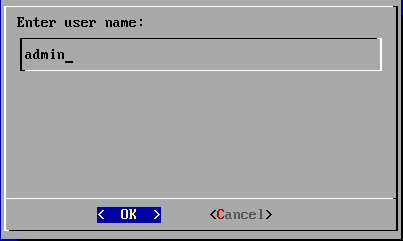
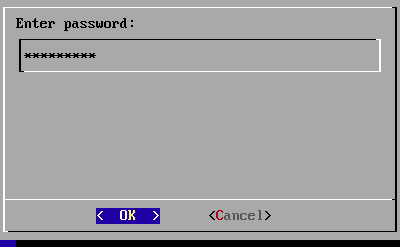
Enter VergeIO username and password.
Note: The user must have permission to create and modify virtual machines to complete a clone import.
-
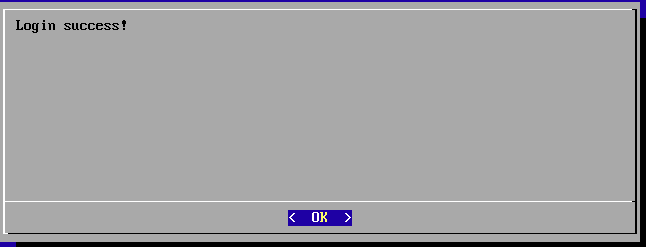
A success message displays if the utility successfully connects to the VergeIO system.
¶ Clone Utility Troubleshooting
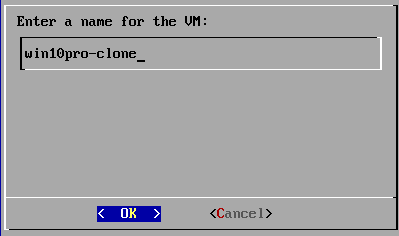
Enter a name for the VM (the name given to the VM created on the VergeIO system).
Use arrows and spacebar to select/deselect drives for import. By default, the boot device containing the ISO (e.g., CD/DVD, USB) is not selected as it is not necessary to import the contents of the clone iso. Not selected drives are created as empty devices on the destination virtual machine.

¶ Advanced Settings
NOTE: Use the following with EXTREME CAUTION. Adjusting the settings here can cause additional stress on your system and could cause performance issues. Contact VergeIO support for more information.
Advanced options are accessed by selecting Advanced and hitting Enter.
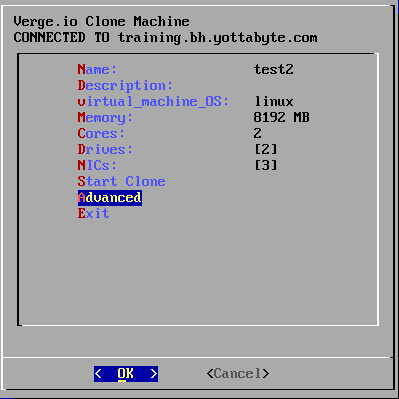
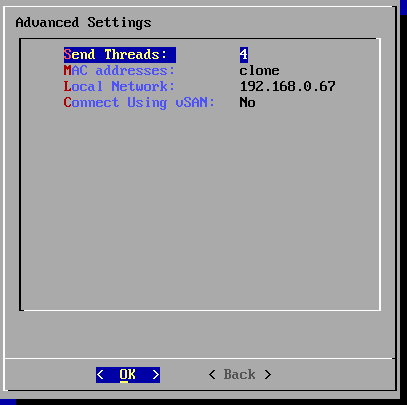
Send Threads - number of parallel threads to use for clone transfer.
- Default=4
The default thread setting is optimized for typical WAN connections and usually does not need to be changed. However, threads can be increased to maximize bandwidth use in situations with high latency or over high-speed connections.
Note: Setting threads too high can hurt performance.
MAC addresses - Clone existing or create new MAC addresses
- Default = Clone (MAC addresses are duplicated from the Source)
Local Network - NIC selection for connecting to the VergeIO destination system.
- Default = Previously selected NIC
Connecting Using vSAN - The method for transfer to destination VergeIO system
- Default = No (Use the standard https transfer method)
Guest - (legacy/deprecated)
Yes/Sync directly Use direct vSAN connection method. This method can provide faster transfers, allowing for writing directly to the VergeIO vSAN. This method requires additional network configuration. Contact Support for more information.
-
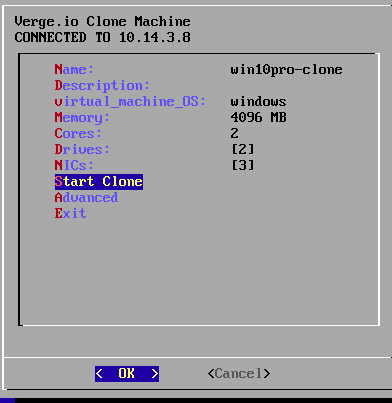
Enter while the Start Clone field is selected to confirm and begin the clone.
-
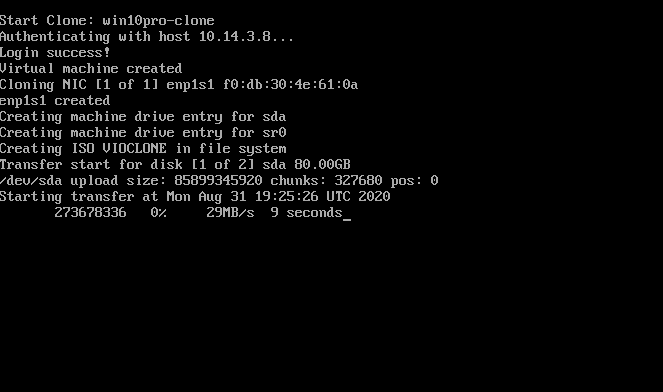
Progress updates will display. As each drive is cloned, the number of bytes already transferred, percentage complete, transfer rate, and elapsed time of this drive transfer are reported.
NOTE: Once the import is complete, before powering up VM for the first time in VergeIO , it is highly recommended to take a snapshot. If needed, this will allow returning to the original version after any initial guest OS/driver changes are performed.
A Snapshot of an individual VM can be created using the Take Snapshot option on the left menu of the VM Dashboard.
Taking a Snapshot before making any changes or booting the new VM for the first time will allow for rolling back a change if necessary. Once it is verified that the new VM is booting successfully and no additional configuration or driver changes are needed, the Snapshot is no longer needed.
¶ Resuming a Clone import
A Clone import that successfully started but did not complete (due to network disruption, for example) can be resumed.
-
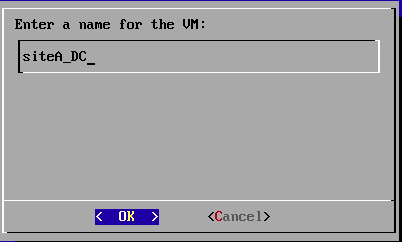
Boot the source computer from the VergeIO clone ISO again and follow the same process, ensuring to input the VM name exactly as it was the first time. (The VM name can be verified on the destination VergeIO system in the Virtual Machines list.)
-
Use the right arrow → key or Tab to select the Resume option, and hit Enter.
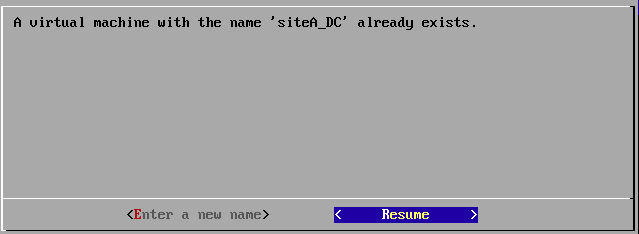
The clone import will continue from where it left off.
¶ Rebuilding the Clone ISO
The Clone ISO can be rebuilt to take advantage of code updates.
To manually initiate this process:
- Click Backup/DR on the left menu from the Main Dashboard.
- Click Edit Clone ISO on the left menu.
- Check the Force Rebuild checkbox.
- Click OK.
The rebuild may take a few minutes. While in process, the status will indicate "Building."

The status will change to "Ready" when the ISO build is complete.
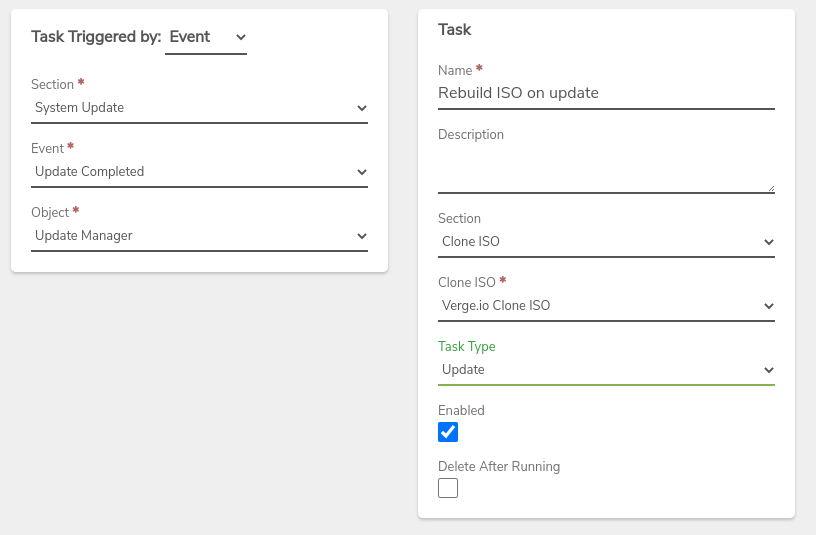
Rebuilding the ISO can be automated. Some customers opt to update the clone ISO anytime the system is updated.
To schedule automatic ISO rebuilds:
-
Click System on the left menu from the main dashboard.
-
Click Tasks/Events on the left menu.
-
Click New on the left menu.
-
Configure the task as shown to automatically rebuild the ISO each time the VergeIO system is updated :
-
Click Submit to save the new task.
¶ Direct vSAN Network Configuration
Direct vSAN transfer method is provided for use over local networks; it is not intended for use over WAN connections.
Direct vSAN transfer method can only be used to transfer to a root system (not directly to a Tenant).
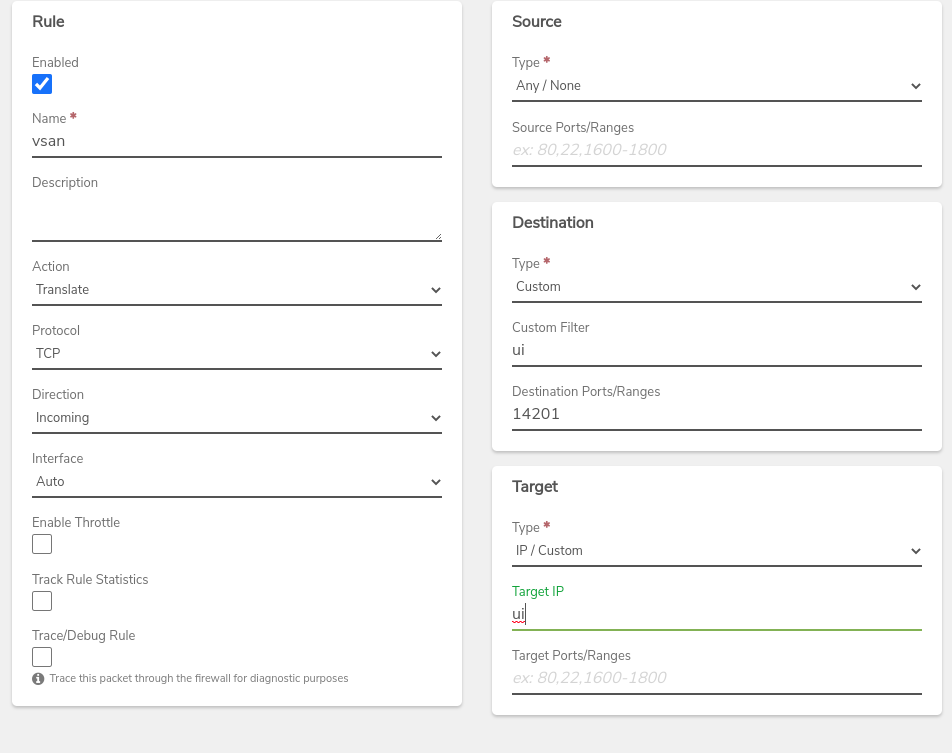
To use the vSAN Mount (direct sync) method of the Clone ISO utility, three networking rules must be in place (2 on the core network and 1 on the external UI network).
The following section outlines the network rules for a system to accept a Clone ISO transfer using the direct vSAN method. Some of these rules may already be in place for a VergeIO system that has been configured to accept incoming syncs.
¶ Core Network Rule - 14201 PAT Rule
Note: For systems already configured for accepting incoming syncs, this Rule may already be in place.
- Name (required): ex: “vSAN PAT”
- Action: Translate
- Protocol: TCP
- Direction: Incoming
- Source: Any / None (default)
- Destination Type: Custom *Custom Filter: ui Destination Ports: 14201
- Target Type: IP/Custom *Target IP: ui
* UI is a VergeIO keyword; it must be entered in lower case, exactly as noted.
¶ Core Network SNAT
- Name (required): ex: “vSAN SNAT for Clone Utility”
- Action: Translate
- Protocol: TCP
- Direction: Outgoing
- Interface: Router
- Source: Any / None (default)
- Destination Type: My Network Address Destination Ports/Ranges: 14201
- Target Type: My Router IP
The new rules will appear in the Rules list for the Core network.
Click Apply Rules on the left menu to put the new rules into effect.
¶ External Network - 14201 PAT rule
- Name (required): ex: “vsan PAT”
- Action: Translate
- Protocol: TCP
- Direction: I_ncoming_
- Source: Source IP/IP range from which clone transfer will come. Note: It is important to include a source IP/Network here in order to restrict incoming 14201 traffic to only valid sync/clone transfer sources.
- Destination Type: My Router IP Destination Ports/Ranges: 14201
- Target Type: IP/Custom Target IP: *ui **(*This is a VergeIO keyword; it must be entered in lower case, exactly as noted)
The new External vSAN Rule will appear in the Rules list for the External network.
Click Apply Rules on the left menu to put the new rule into effect.
¶ Clone Utility Troubleshooting
ISSUE: Failed DHCP
DHCP option was selected, but no DHCP service was found

- Verify there is a DHCP service available via the selected NIC.
- Verify the selected network actually has a connection.
ISSUE: Login failed message
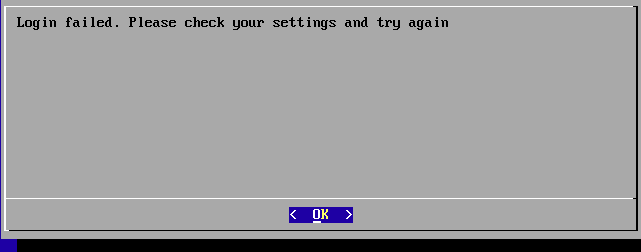
- Verify input of correct username and password
- The Login failed message can also appear when there is an issue with network connection or URL. Verify input of correct VergeIO system host/IP address.
Note: The address should be entered without preceding "https://"
- Verify static IP configuration information (if applicable)
- The IP address and gateway must be valid addresses for the attached network. Note: The IP address must be entered in CIDR notation (e.g. 192.168.0.50/24).
- Verify that there are no IP conflict with the used IP address.
- The correct DNS address must be used to connect the VergeIO system via hostname.
- Verify underlying network connection. Boot the computer without the clone ISO to test reaching the VergeIO host/IP address; confirm connection over specific NIC, using the same configuration (e.g., DHCP or static addressing).
ISSUE: OpenSSL errors during the transfer
OpenSSL errors during the transfer indicate a network issue. The clone operation will retry and can often recover from an OpenSSL error. The clone operation will abort if timeout or number of retries threshold reached.
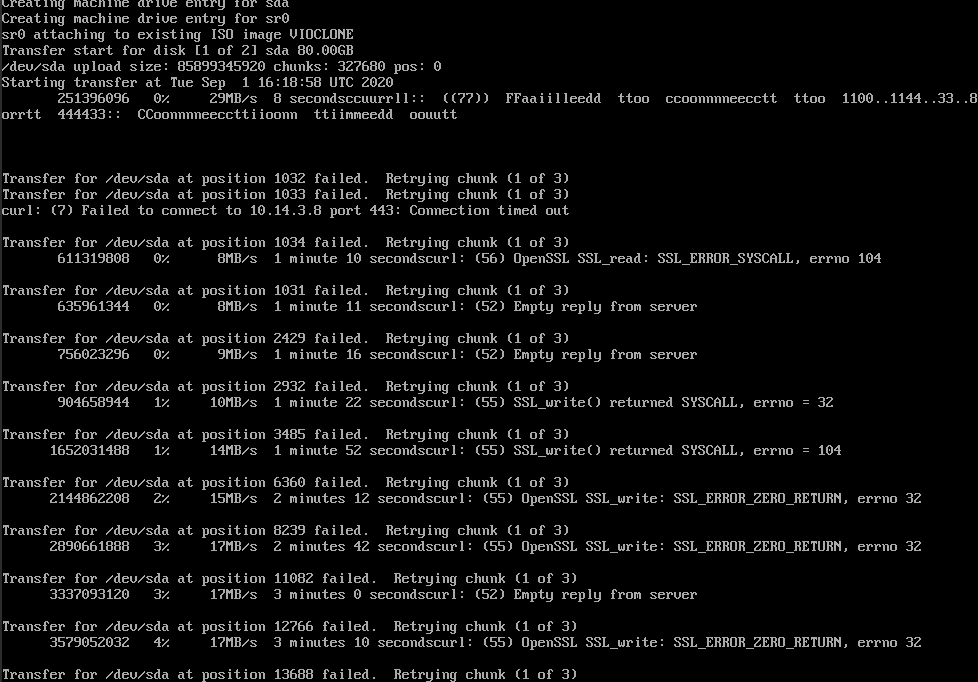
- A possible cause for sporadic OpenSSL errors, can be MTU size mismatches. Verify the MTU configuration on connecting networks.
If a network issue causes a clone import to fail before finishing: a partial clone import can be restarted where it left off by:
- Resetting the machine and booting again from the VergeIO Clone ISO
-or-
- Use the ESC key to return to the command line and use the command:
/usr/bin/VergeIO -clone-vm.sh
ISSUE: Permission denied
If the VergeIO user provided does not have adequate permissions, the clone will begin and create the new Virtual Machine record; however, it will not be able to create any VM drives or NICs.
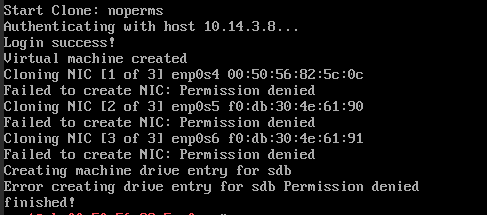
- Restart the clone ISO providing username/password of a VergeIO user with List, Read, Create and Modify permissions to Virtual Machines.
Note: Since the empty VM will have been created on the destination VergeIO system (when run initially without adequate permissions): when run again with proper permissions, the clone operation can be performed as a resume, or the VM can be removed on the destination system before starting the clone again.
Need more Help? Email [email protected] or call us at (855) 855-8300