¶ Windows:
- Download the latest version of the VergeIO installation ISO.
https://updates.verge.io/download
NOTE: This may not be the most recent version. Please talk to your account representative to make sure you have the latest version.
- Insert a USB disk into the computer.
WARNING: This USB drive will be overwritten.
-
Launch Rufus. https://rufus.ie/en/
-
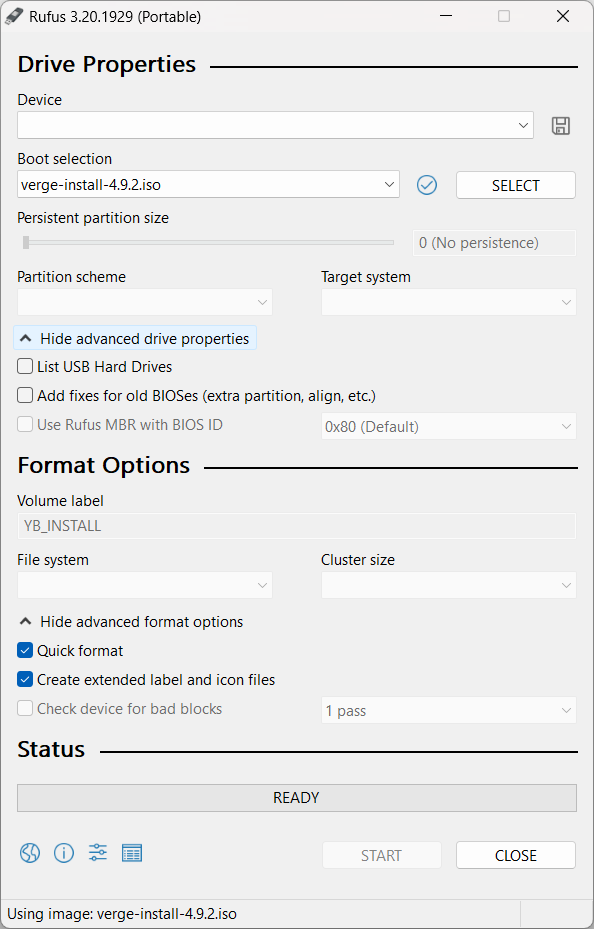
Once Rufus is loaded, select the USB device to write to for the area labeled Device.
-
Click the Select button to select the VergeIO installation ISO image.
-
Click Start
-
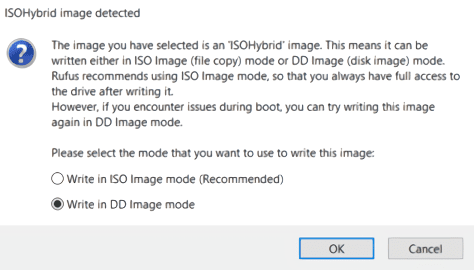
Rufus will prompt you to choose an ISO Mode. Choose DD. Rufus will begin building the bootable USB device.
¶ Apple MacOS:
- Download the latest version of the VergeIO installation ISO. https://updates.verge.io/download
NOTE: This may not be the most recent version. Please talk to your account representative to make sure you have the latest version.
- Insert a USB disk into the computer.
WARNING: This USB drive will be overwritten.

- Download and install the BalenaEtcher image flasher for the macOS.
- Startup the BalenaEtcher app.
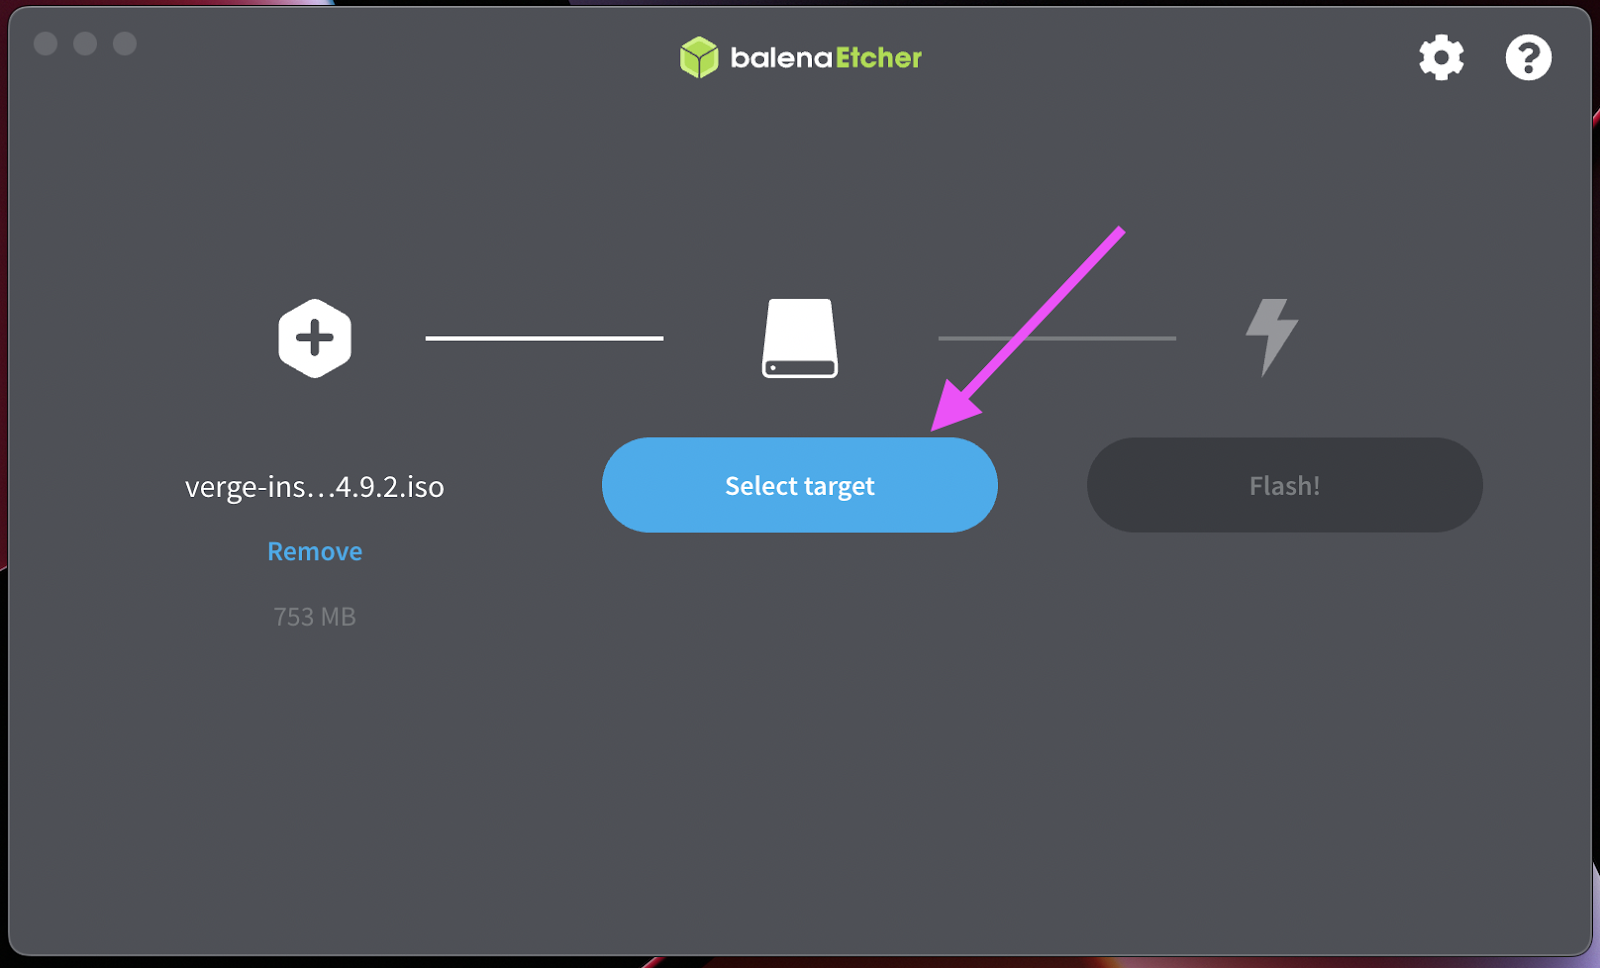
- Click on Flash from file.

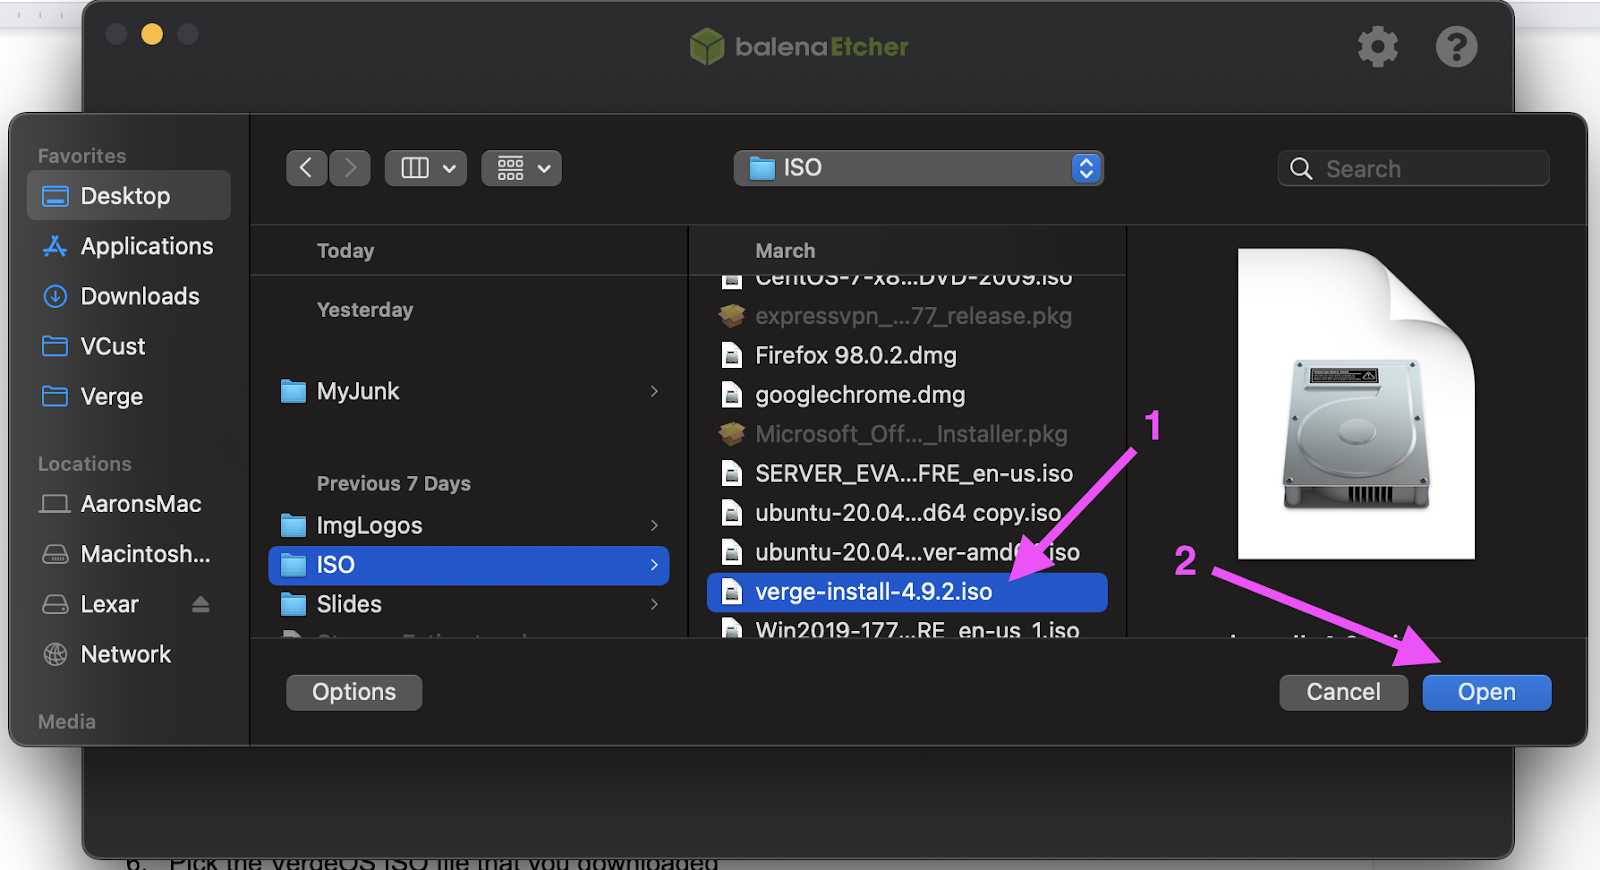
- Pick the VergeOS ISO file that you downloaded.
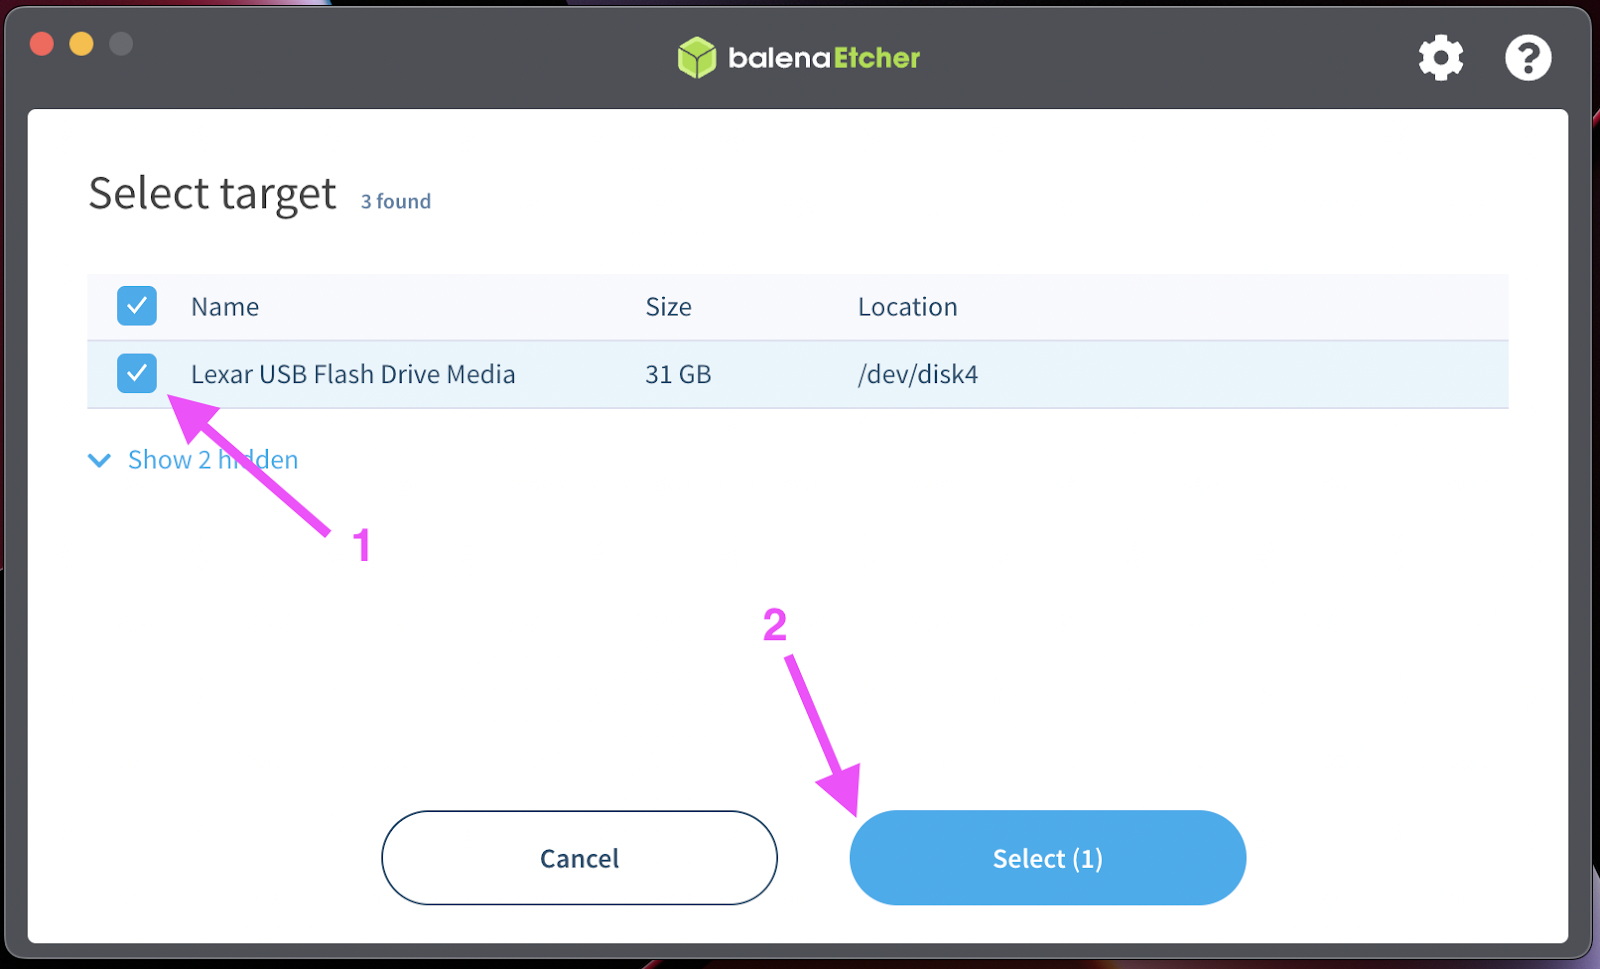
- Select your target USB disk, but NOT the hidden drives
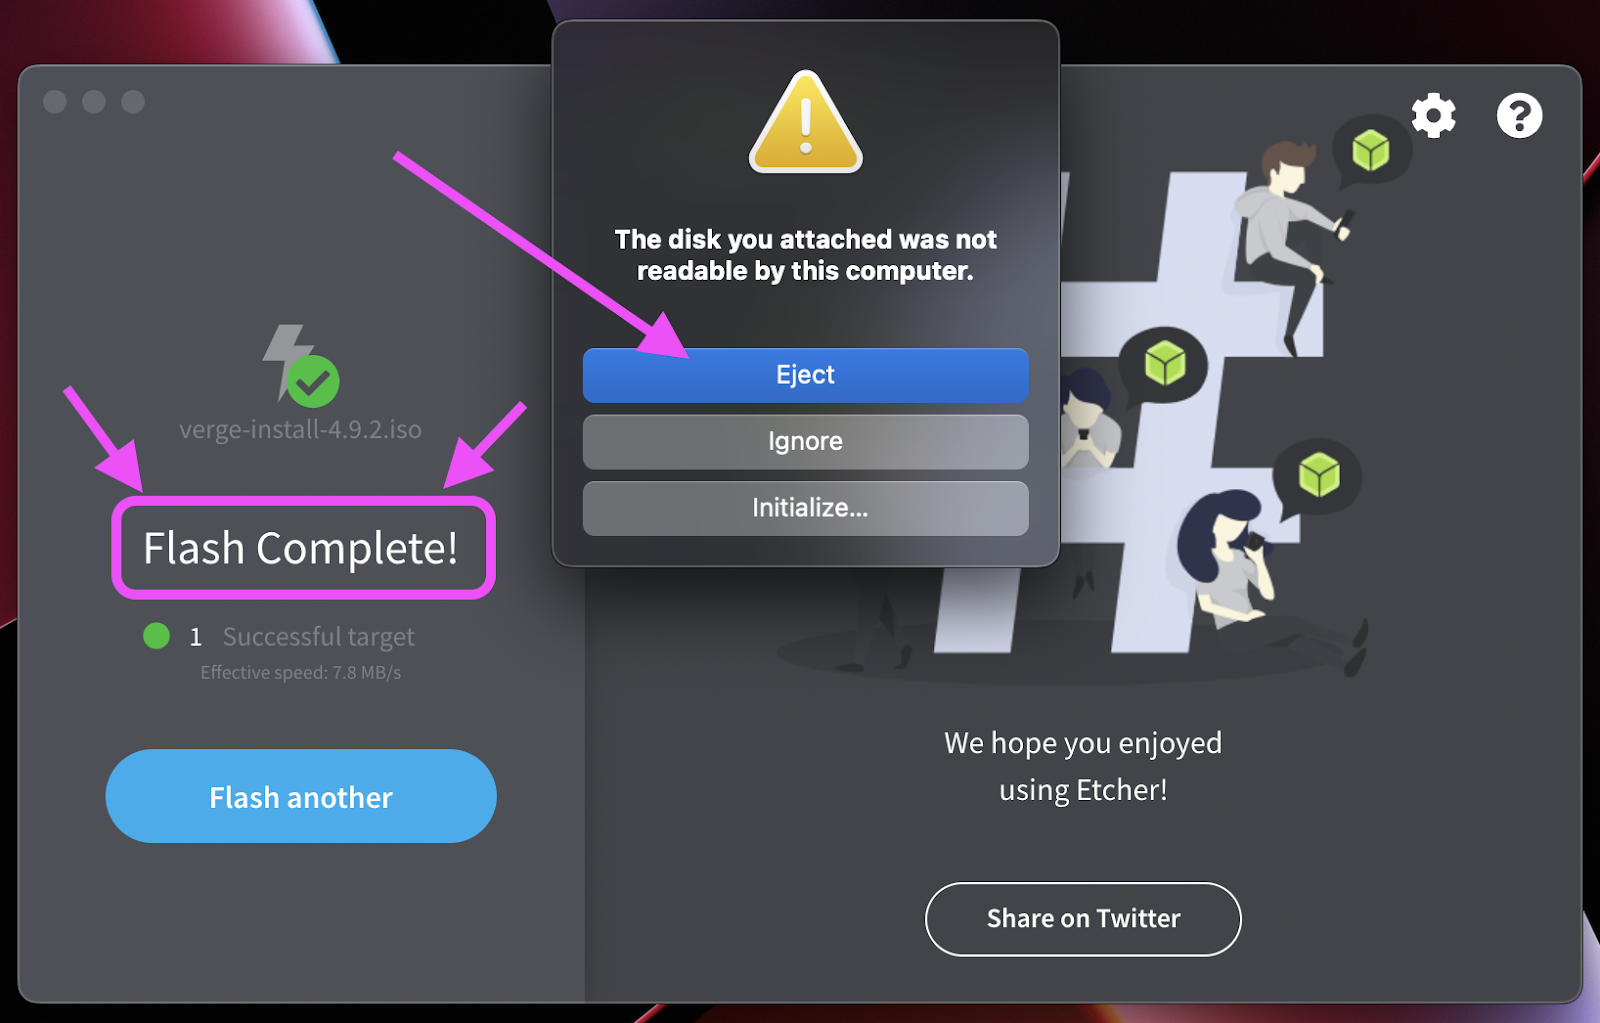
- Click on Flash!

- This will build your bootable flash drive on your USB stick using the VergeOS ISO installer. This process usually takes a few minutes to complete and then you can “eject” your USB flash drive to boot and start the installation on your servers.
¶ Linux Mint:
- Download the latest version of the VergeIO installation ISO
NOTE: This may not be the most recent version. Please talk to your account representative to make sure you have the latest version.
- Insert a USB disk into the computer.
WARNING: This USB drive will be overwritten.
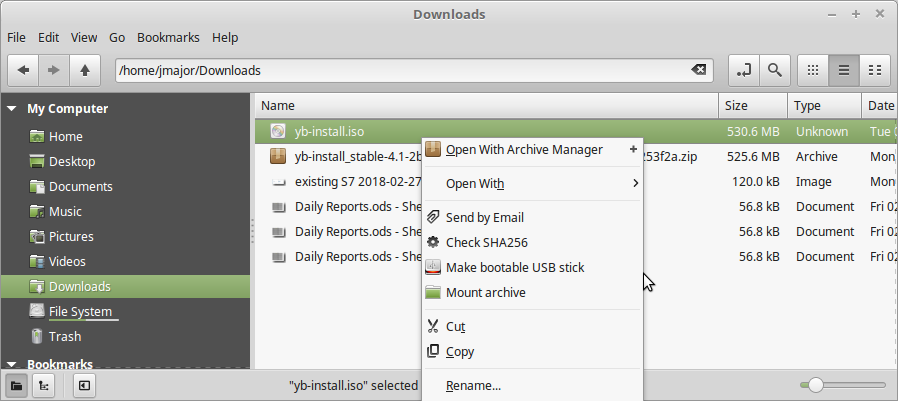
- Using Mint’s file browser, navigate to the location of the downloaded ISO
- Right-click on the ISO and choose ‘Make bootable USB stick’
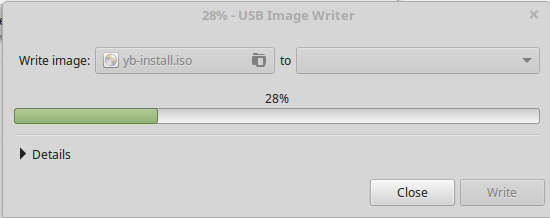
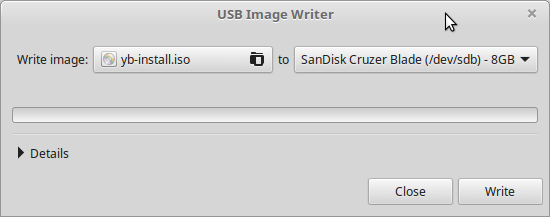
- As USB Image Writer loads, select the USB media to write the installation file to.
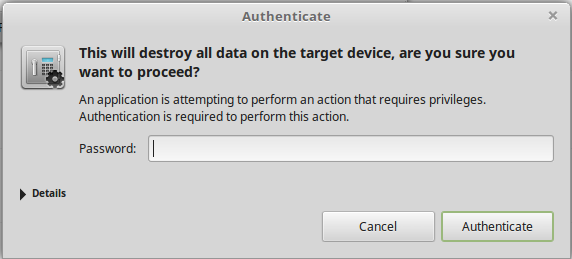
- As a security measure, Linux will prompt you to supply an admin password
- Click Authenticate to begin writing the installation to USB
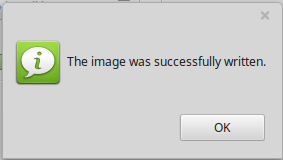
- Wait while the installation is written to USB.
- When finished this message will appear.
Need more Help? Email [email protected] or call us at (855) 855-8300