¶ Importing VMs from Media Images
Importing via Media Images is a convenient way to import a single VM at a time. VM Data files, such as vmx, vmdk, ovf, vhd(x), are uploaded to the VergeIO vSAN and then selected for import.
¶ Import VM (config and disks) from Media Images
Note: Hyper-V VMs should be exported to .ova/ovf format or VMware format before upload, or use the Create VM Shell, Import VM Disks method below to create the VM first and then import disks.
- Upload configuration and disk image files to the vSAN. For instructions on uploading files to the vSAN, see Managing Media Images.
- From the Cloud Dashboard, Click Machines from the left menu.
- Click New VM from the left menu.
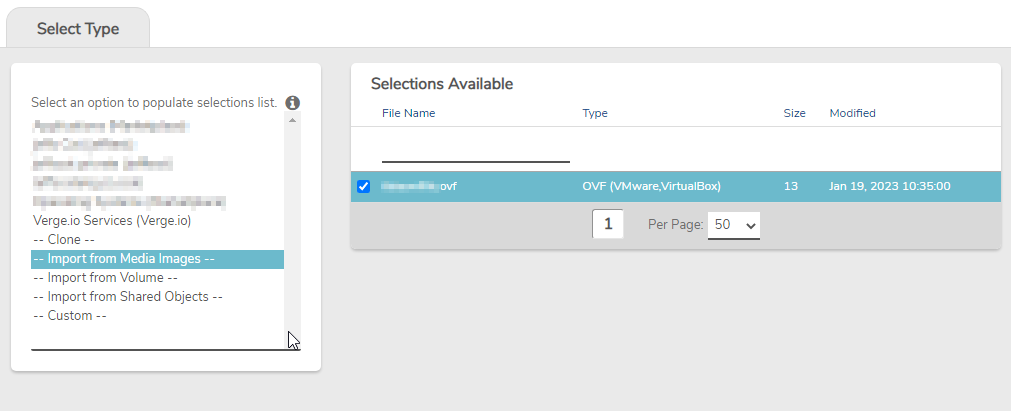
- From the options list, select --Import from Media Images--. Available files (that have been uploaded to the vSAN via Media Images) will appear in the Selections Available list on the right side. Click to select the VM configuration file (e.g. *.vmx, *.ovf)

- Click Next (bottom of the screen).

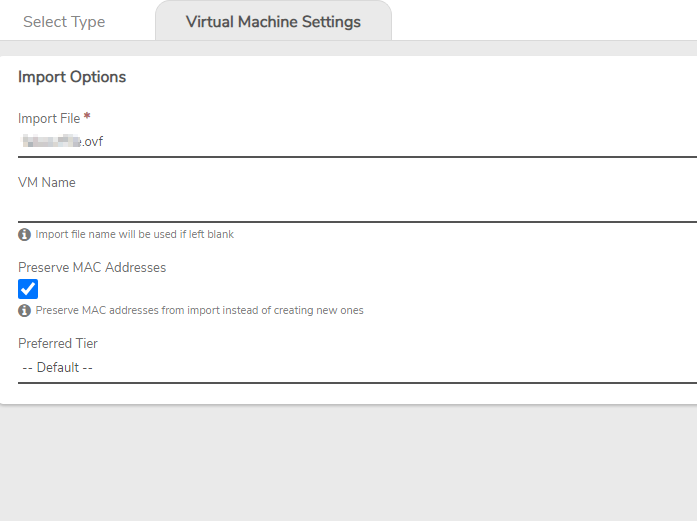
- The VM Name will default to the name of the selected configuration file if left blank; otherwise a name can be specified.
- Preserve MAC Address - By default MAC Address(es) of VM NICs will stay the same as the source VM. If this option is unselected, the system will generate a new, unique MAC address(es).
- Select Preferred Tier, or leave at --default--. This determines the tier first attempted for VM storage. See Preferred Tier Usage for information on how Storage Tiers are handled.
- When fields are entered as desired, click Submit.
- The VM instance is created and the dashboard for the new VM is presented.
¶ Create VM Shell, Import VM Disks
When it is not possible to import from a configuration file, a VM shell (disk-less VM) can be created, and then disks imported from standard files (such as vhd(x)).
- Upload disk image files to the vSAN. For instructions on uploading files to the vSAN, see Managing Media Images.
- Create a new Custom VM, assigning appropriate hardware specifications and NIC device(s). See Creating VMs section of the VergeOS help for information on how to create a Custom VM (Append #help?id=vms-creating&bookmark=custom to the end of your VergeOS URL for a direct link).
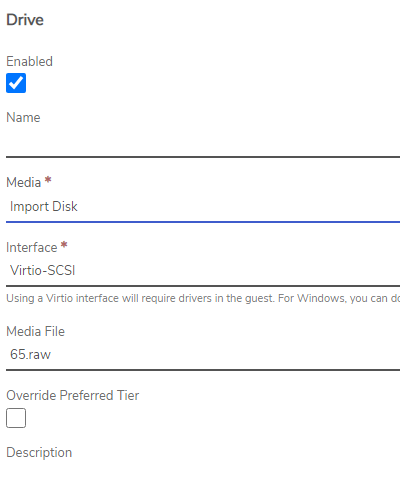
- Add a new drive to the VM, being sure to select Import Disk in the Media field.

- Select the appropriate Interface (IDE, SATA, virtio-scsi, virtio-legacy, etc.). Choosing SATA can help with driver issues as it is more supported by the guest OS.
- Select the Media File of the disk (*.vhd, *.vhdx, *.qcow, raw, etc.) from the dropdown list.
- If applicable, repeat the drive creation steps for additional drives.
- Start the VM and verify everything boots correctly.
The following type of files are supported when using media images for import
- IMG (Raw Disk Image)
- RAW (Binary Disk Image)
- QCOW (Legacy QEMU)
- QCOW2 (QEMU, Xen)
- VDI (VirtualBox)
- VHD/VPC (Legacy Hyper-V)
- VHDX (Hyper-V)
- OVA (VMware, VirtualBox)
- OVF (VMware, VirtualBox)
- VMDK (VMware)
- VMX (VMware)
¶ Troubleshooting issues
Below are some common issues and resolution steps.
¶ Failure to boot disk into OS
This is usually a driver issue. Typically this shows up as Inaccessible Boot Device in Windows.
Resolution Steps:
- Switch the drive interface type from virtio-scsi to another type. Typically IDE or SATA will resolve the boot issue.
- Once the guest OS has booted, install the virtio drivers for the interface either by attaching them via a CD-Rom or downloading them directly into the guest from here.
- Shut down the VM
- Switch the driver interface type to virtio-scsi
- Start the VM
Need more Help? Email [email protected] or call us at (855) 855-8300