¶ Working with the VM Dashboard
A Virtual Machine’s Dashboard will provide thorough information about the VM, including:
- Current Status (Running, Stopped, Starting, etc.)
- Settings
- Resources assigned to the VM
- Usage stats (as well as history)
- Drives, Nics, Snapshots, Active consoles, Logs, etc.
¶ Accessing a VM’s Dashboard
- Navigate to Machines > Virtual Machines
- Double-click the desired VM in the listing.
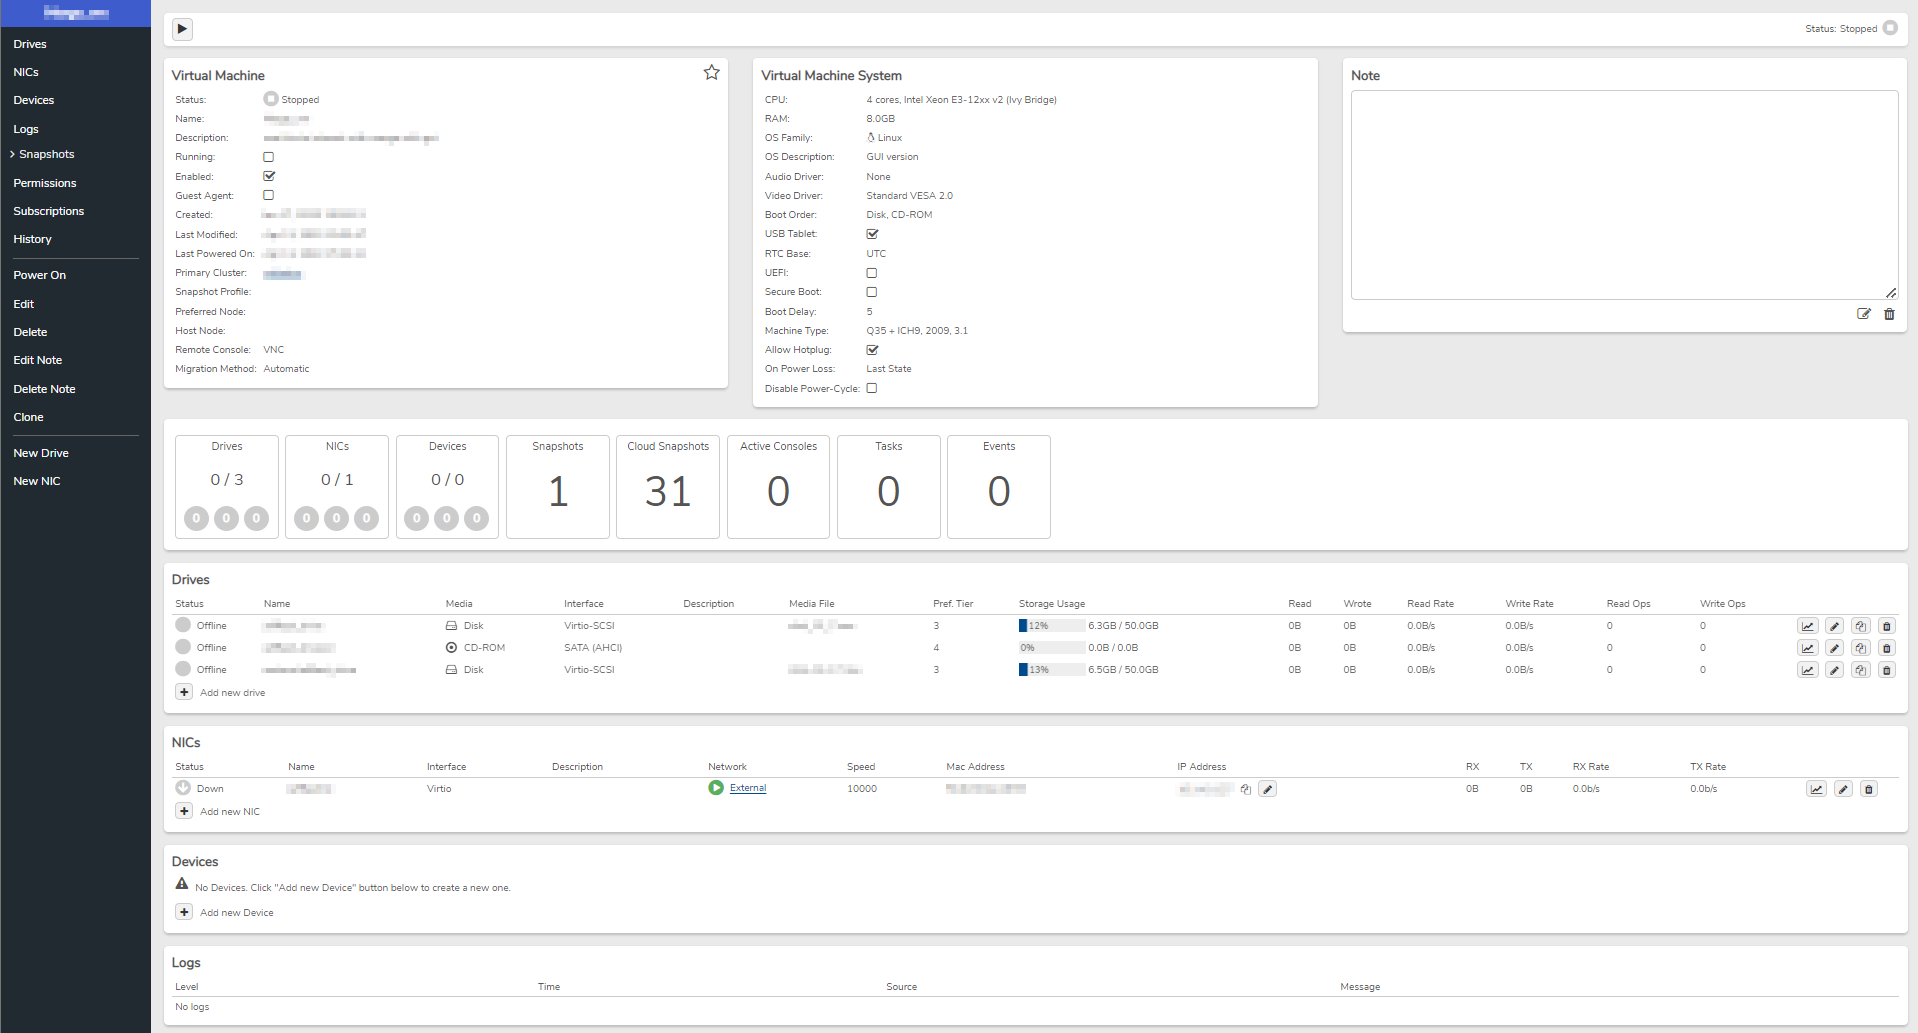
Within the Dashboard there are many clickable areas that allow you to drill down for more detailed information.
¶ EXAMPLE 1:
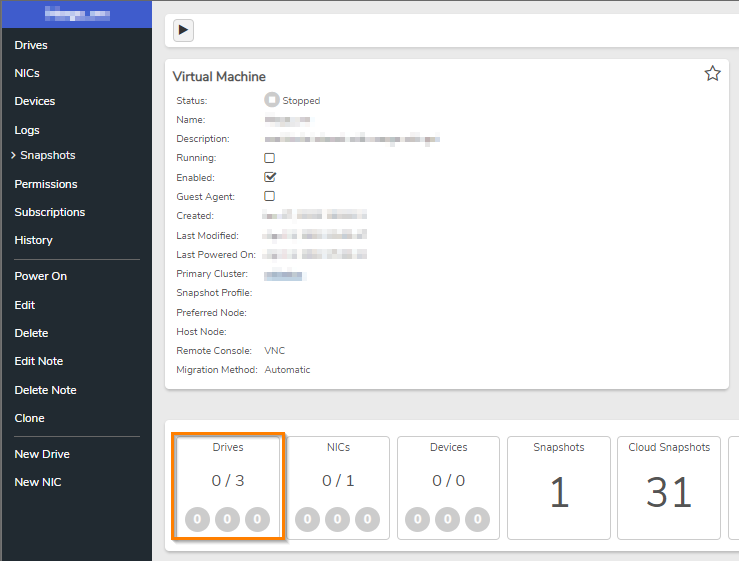
Viewing Drive Detail:
The Drives quick-link provides access to more detailed info about the VM drives.
¶ EXAMPLE 2:
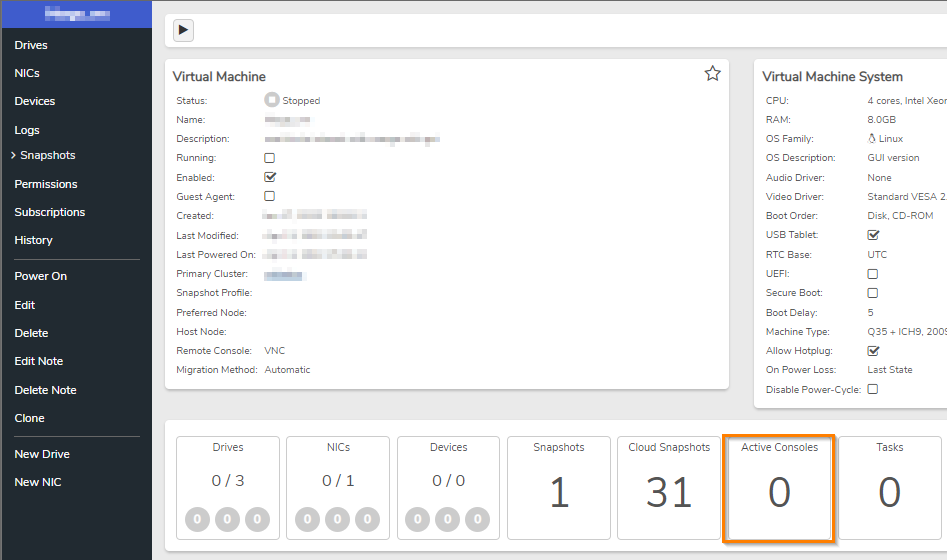
Viewing Active Console Detail:
The Active Console quick-link provides access to more detailed info about the current Active Console sessions.
¶ Powering On / Starting a VM
- The full amount of RAM and cores assigned to the VM must be available within one of the nodes or the VM will not start.
- The system will attempt to start the VM on its preferred node (if the VM has a preferred node specified.)
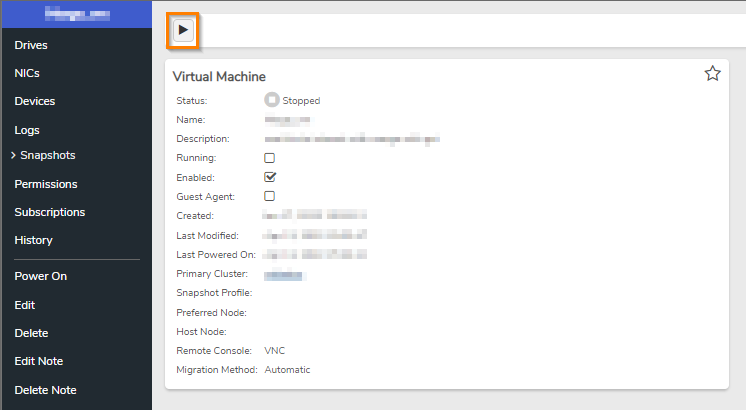
To Start(Power On) a Single VM:
- Go to the VM dashboard (double-click on the VM in the VM listing page)
- Click the Power On button at the top left of the dashboard.
- Click the Yes button on the confirmation screen to proceed with powering on the VM.
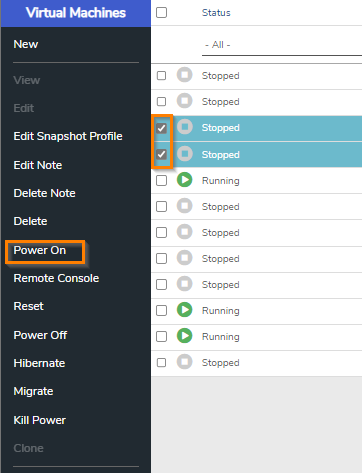
To Start one or More VMs at once
- Navigate to Machines > Virtual Machines This brings up the VM listing.
- Select the desired VM(s). Selected VMs will display a check mark.
- Click Power On on the left menu.
- Click the Yes button on the confirmation screen to proceed with powering on the VM(s).
¶ Using the Remote Console
The Remote Console feature allows keyboard / video / mouse access to your VMs through the Verge.io interface.
NOTE: Each VM can be configured to require a password to access the remote console for that VM. (This does not substitute for secure user / password policies within your guest OS.)
Console Type (VNC recommended in most cases)
By default VNC is the Console Type selected for VergeIO VMs as this is typically the best type to use for servers. Spice is another option and can be used to provide audio passthrough and remote USB support (USB passthrough); it is typically only used for virtual desktop when a full desktop experience is required and there is a high-speed connection.
To Launch the Remote Console for a single VM:
- Navigate to the VM dashboard (Double-click the VM in the VM listing page).
- Click Remote Console from the left menu.
This will open the Remote Console within the same browser tab.
To Launch the Remote Console to New browser tab(s)
- Navigate to Machines > Virtual Machines (This brings up the VM listing.)
- Select the desired VM(s). (Selected VMs will display a check mark.)
- Click Remote Console on the left menu.
- This will open the Remote Console(s) in a new browser tab(s).
Each Remote Console browser tab is labeled with VergeIO Cloud Name | VM Name
NOTE: Remote Console can only be launched for Virtual Machines that are Running.
¶ Power off / Reset / Kill power
In working with Virtual Machines, It’s important to understand how the Power off / Reset / Kill power commands work and the differences with each.
-
Power off - This issues an ACPI command to the VM; it relies on ACPI being enabled and configured within the guest OS. Power off initiates a graceful shutdown of the VM. Testing a Power Off operation from the VergeIO UI (while user is logged in as well as when no user is logged in,) before a server is put into production is recommended.
-
Reset - Exits the guest operating system, returns to virtual bios, but never powers off the virtual hardware. Unlike Power cycle, reset does not relinquish its virtual resources. Some hardware changes will require a power cycle as opposed to a reset in order to take effect.
-
Kill Power - This option should only be used when it is not possible to access the guest OS in order to shutdown gracefully (E.G. The guest OS crashed or locked) This would be equivalent to pulling the power plug on a bare metal machine.
¶ Taking a VM Snapshot
Typically, you will want to handle your scheduled Snapshots through Cloud Snapshots, which provide rollback points for the entire cloud and allow restoring individual VMs as well.
This section will focus on taking manual Virtual Machine Snapshots which are helpful when making substantial changes or upgrades to a VM. For example, if you are performing an upgrade to a mission critical application within the VM, taking a Snapshot immediately before the upgrade allows the option of rolling back to right before the upgrade operation, if necessary.
To Take a Manual Snapshot of a VM:
- Navigate to the VM dashboard (by double-clicking the VM in the VM listing page).
- Click Take Snapshot from the left menu.
- Provide a Name (required) for the Snapshot that will help describe why it is being taken (e.g. “before app update”, “pre-drive resize”, etc.). Optionally, a Description can be entered to input additional administrative info, if needed.

Setting the Expiration
- The default setting expires the Snapshot in 3 days (36 hours). This will typically be sufficient to ensure that the VM changes from an upgrade, etc. are verified. The expiration date and time can be adjusted, if desired.
- The Snapshot can also be set to “Never Expires” in the Expiration Type field; however, this is not recommended. It is important to remember that although Snapshots leverage deduplication and tend to take no to little extra space when first taken, they will consume storage space over time as data diverges between source and snapshot.
¶ Migrating a VM
Migrating a VM moves it to from one host node to run on another host node while keeping the VM running. Migration operations are handled automatically by the system during VergeIO updates and when host nodes are put into maintenance mode. This allows VergeIO updates to be performed without the need to power down VMs (given that enough resources exist).
VMs can also be manually migrated.
To Migrate a single VM:
- Navigate to the VM dashboard (by double-clicking the VM in the VM listing page).
- Click Migrate from the left menu.
- The default selection of --auto-- will automatically select target node for migration based on resource balancing. You can also select a preferred node to select a specific one to which you would like to migrate. Click the Migrate button to begin the process.
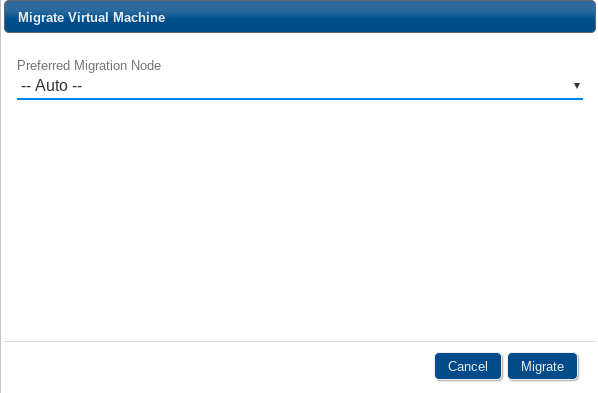
While the VM is migrating, the status field (top left) on the VM Dashboard will reflect that. The status will return to Running after it has migrated to the destination Node. Additionally, the Host Node field will update to reflect the new node.
To Migrate One or More VMs at once
- Navigate to Machines > Virtual Machines (This brings up the VM listing.)
- Select the desired VM(s). (Selected VMs will display a check mark.)
- Click Migrate on the left menu.
- The default selection of --auto-- will automatically migrate the VM to a node based on resource balancing. You can also select a preferred node to select a specific one to which you would like to migrate. Click the Migrate button to begin the process.
While a VM is migrating, the status field column (far left) will reflect that. The status will return to Running after it has migrated to the destination Node. Additionally, the Host Node field (far right) will update to reflect the new node on which the VM is running. The Progress bar will show status of how many of the selected VMs have currently migrated.
¶ Cloning a VM
The cloning feature allows you to create a new VM instance as a replica of an existing VM (with or without same MAC addresses). This can come in handy for a variety of different reasons: testing, deployment, data recovery, etc. Cloning a VM in VergeIO is nearly instantaneous and an easy process.
To Clone a VM:
- When possible, stop the VM before cloning it.
- From the VM Dashboard or on the Virtual Machines listing page with a VM selected, select Clone from the left menu.
- The name of the source VM along with the resources (cores/RAM, OS, # of drives, and # of NICs) is displayed.
- The VM Name will default to original VM Name + "clone"; however, the name can be changed as desired.
- By default, VergeIO will create new unique MAC address(es) (different from the source VM) for all NIC devices in the new instance. The "Preserve MAC Addresses" option can be enabled in order to copy MAC addresses from the original VM to the new clone instance. However, preserving MAC addresses should be used with caution as duplicate addresses running on the same network will cause problems.
- Click Submit. The VM instance is created and the new VM's dashboard page appears.
¶ Deleting a VM
Considerations when deleting a VM:
- The system will not allow a VM to be deleted if it is running.
- A VM that is currently the basis of a VM Recipe cannot be deleted.
- Deleting a VM will also delete its VM snapshots. However, Cloud Snapshots that were taken when the VM existed will still contain it.
To Delete a VM:
- The VM must be powered down before it can be deleted.
- From the VM Dashboard or on the Virtual Machines listing page with VM(s) selected, select Delete from the left menu.
Need more Help? Email [email protected] or call us at (855) 855-8300