¶ WireGuard Configuration Examples
The following are provided as example WireGuard implementations. Refer to the general WireGuard help page for more guidance on individual field settings. Note: The following examples use sample addressing scenarios; actual implementations should be configured with addresses/settings appropriate to the the particular environments.
¶ Example: Creating a VPN Tunnel between Two VergeIO Systems
For this example, "SystemA" and "SystemB" will be used to denote the 2 VergeIO systems to be connected via VPN.
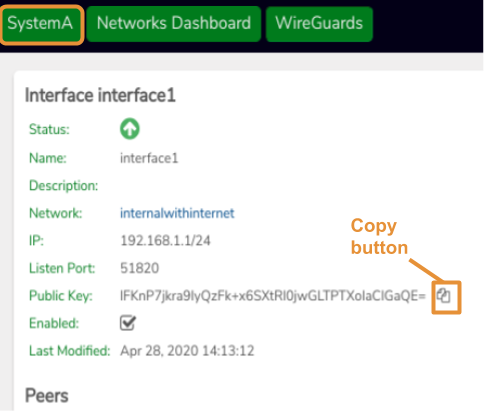
¶ On SystemA:
- Create a WireGuard Interface.
- Copy the generated Public key (for the Interface) to the clipboard, using the copy icon.
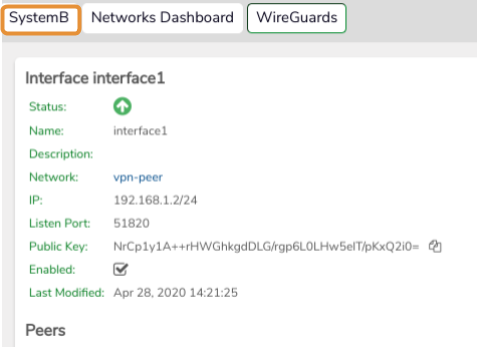
¶ On SystemB:
-
Create a WireGuard Interface.
-
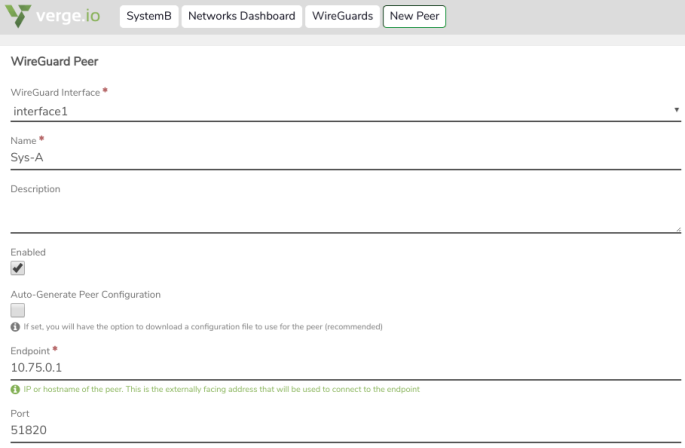
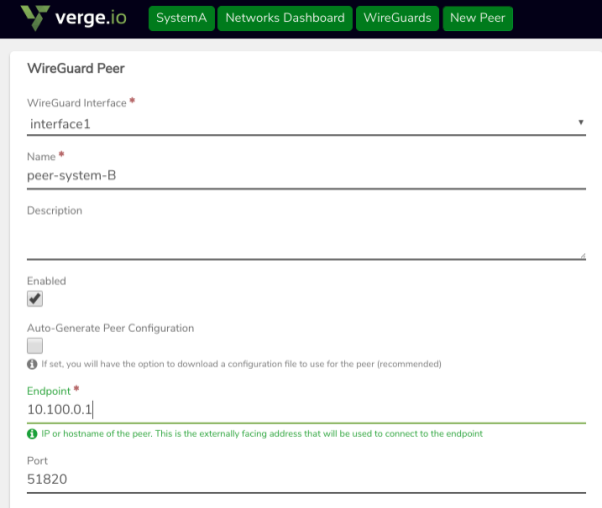
Create a Peer definition (to allow SystemA to connect to this system.)
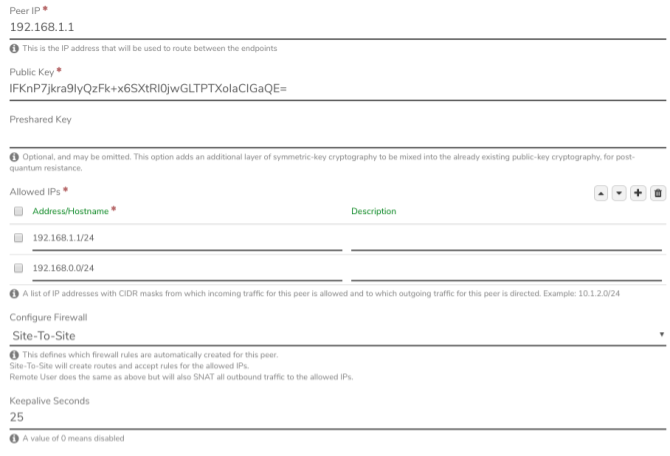
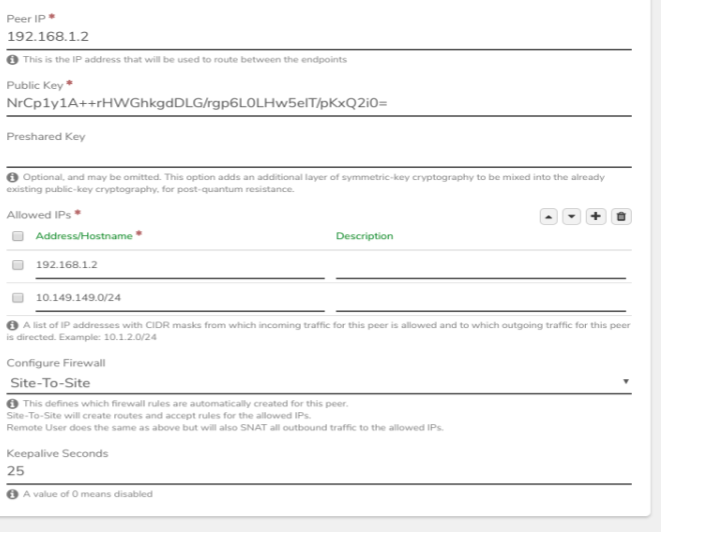
- In the Public key field, paste in the key already copied from SystemA.
- In the Allowed IPs section:
- add an entry for the address of the WireGuard interface on SystemA.
- add an entry for the connected network on SystemA (e.g. the network to which WireGuard is connected.
-
While still on SystemB, copy the generated public key, using the copy icon.
¶ On SystemA:
- Create a new Peer definition (for SystemB to connect here.)
- In the Public key field, paste in the key copied from SystemB.
- In the Allowed IPs section:
- add an entry for the address of the WireGuard interface on SystemB.
- add an entry for the connected network on SystemB (e.g. the network to which WireGuard is connected.)
¶ On SystemA and SystemB:
- Apply Rules (on the networks where Wireguard interfaces were created) to put system-generated network rules into effect.
¶ Testing the site-to-site VPN Connection
A simple ping test can be done using the Diagnostics tool on each system as an initial test of the connection.
-
On SystemA: navigate to the Network Dashboard (the network to which WireGuard is attached)
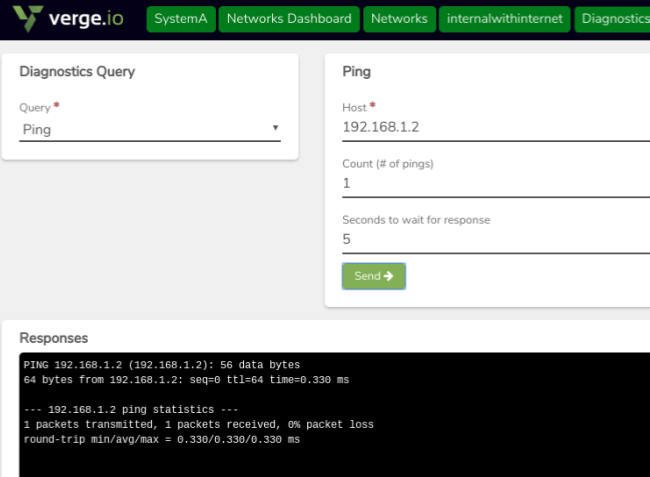
- Select ping from the Query list dropdown.
- Ping the interface address on SystemB(from our example: 192.68.1.2)
- Similarly, other IP addresses from SystemB (e.g. VMs on the attached Network ) can also be ping-tested here.
- Perform the same tests from SystemB to ping addresses on SystemA
¶ Example: Configuring for Remote Access - Windows Client
This example covers setup for a single, remote access peer (a Windows client), and presumes a WireGuard Interface has already been created on the server side (the VergeIO system).
¶ Create New Peer:
- On the VergeIO system, navigate to the WireGuard(VPN) dashboard.
- Click New Peer on the left menu.
- Select the appropriate WireGuard Interface from the dropdown list.
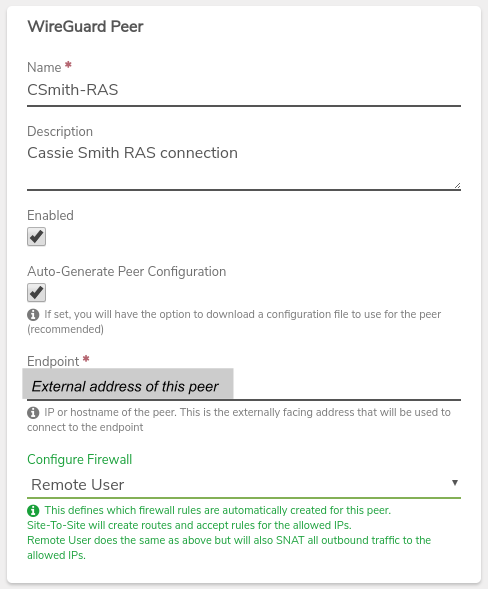
- Assign a Name to the peer, such as the remote user's name.
- Optionally, a Description can be entered to store additional information about this peer.
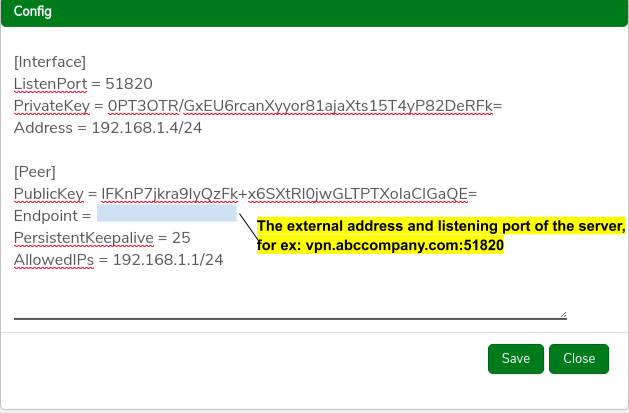
- Check the Auto-Generate Peer Configuration checkbox to automate settings and create a configuration file that can be used on the client.
- Enter the Endpoint for the Peer (the external-facing IP address, hostname, or URL this system will use to communicate with the peer.)
- In the Configure Firewall dropdown, select Remote User
- Click Submit to save the new peer entry.
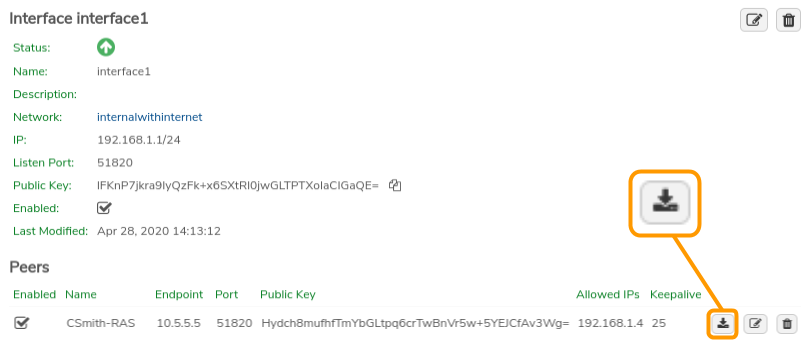
¶ Download the Configuration File:
- Click the Download Config button on the peer record and select a location for the file; download to a location that will be accessible to the client computer or from which can otherwise be transferred to the client.
¶ Install WireGuard Software on Client:
- WireGuard Client software can be downloaded from: https://wireguard.com/install.
(In this example, we download and install WireGuard for Windows-64bit to use on a Windows 10 Pro machine.)

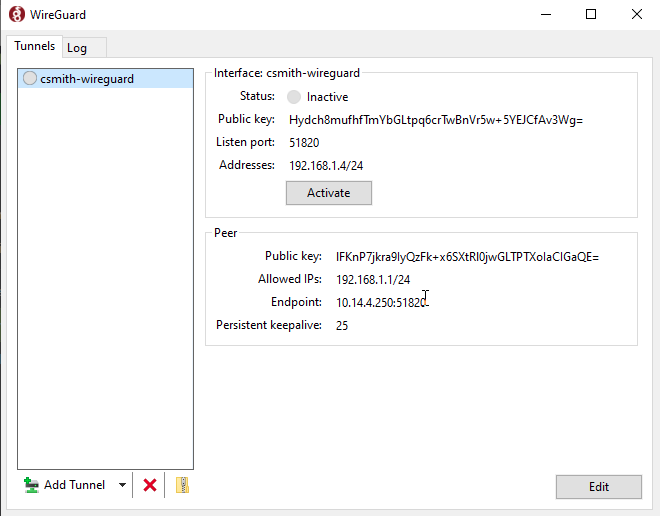
- Click Add Tunnel.
- Navigate to and select the generated configuration file.
- The configuration file is used to automatically create an interface and peer on the client machine. Click the Activate button to open the tunnel, if it was not automatically activated.
Need more Help? Email [email protected] or call us at (855) 855-8300